Home » Seed-to-Flower Cycle: How Cannabis Plants Develop
Seed-to-Flower Cycle: How Cannabis Plants Develop
Cannabis is one of the most fascinating flowering plants in the world. Its lifecycle is defined by a sequence of growth stages—from a dormant seed to a fully flowering plant ready for harvest. Each stage requires specific environmental conditions, nutrients, and grower decisions to ensure healthy development and optimal yields.
This guide explores the cannabis seed-to-flower cycle in depth. It explains the biological processes behind each phase, provides practical growing advice, and includes insights tailored to Australian conditions. Whether you’re curious about how cannabis grows or seeking to understand cultivation science, this article will equip you with a complete overview of how cannabis plants develop.
Understanding the Cannabis Lifecycle
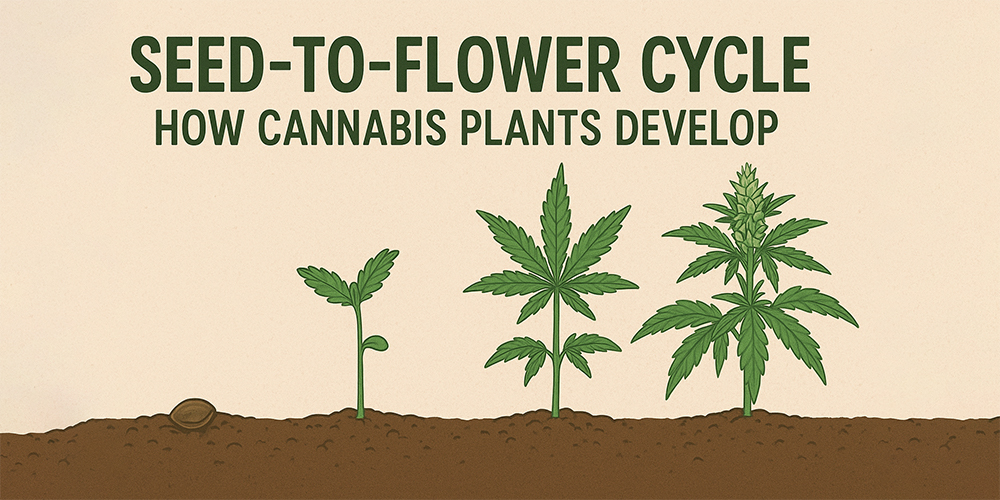
The cannabis plant’s lifecycle can be divided into six key stages:
Germination – the awakening of the seed.
Seedling – delicate early growth.
Vegetative Growth – vigorous leaf and stem expansion.
Pre-Flowering – transition triggered by light cycles.
Flowering – bud production and resin development.
Harvest & Post-Harvest – finishing, drying, and curing.
Photoperiod vs. Autoflowering Strains
Photoperiod strains depend on light cycles. Typically, 18 hours of light maintain vegetative growth, and switching to 12 hours of light triggers flowering.
Autoflowering strains flower automatically after 3–4 weeks regardless of light, completing their lifecycle in 8–10 weeks.
For Australian growers, both types are used. Autoflowers are popular in climates with unpredictable weather, while photoperiods remain the standard in licensed medical cultivation.
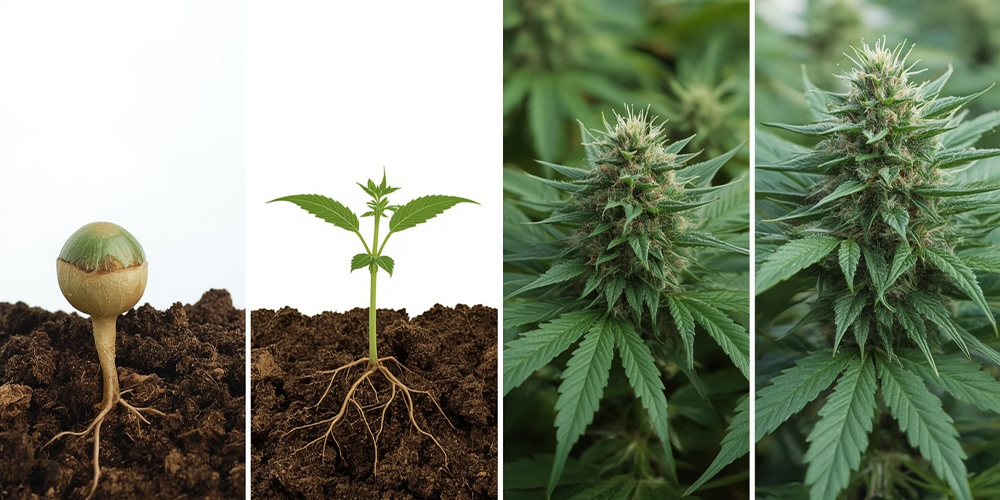
When a cannabis seed is exposed to warmth and moisture, metabolic activity begins. The seed coat cracks, the taproot emerges, and the seedling begins to establish itself.
Optimal Conditions
Temperature: 22–25°C
Humidity: 70–90%
Water: pH 6.0–6.5, clean and chlorine-free
Environment: Dark, moist, and oxygen-rich
Common Methods
Paper towel method: Seeds placed between moist towels.
Starter cubes: Rockwool or peat pellets.
Direct soil planting: Minimises transplant stress.
Key Takeaway: Seeds germinate best in warm, moist conditions. Overwatering can suffocate the taproot.
Stage 2 – Seedling (2–3 Weeks)
Characteristics
The plant produces cotyledons (first leaves) followed by serrated fan leaves. Seedlings are fragile and require careful handling.
Care Requirements
Light: 18/6 cycle, low intensity (PPFD ~200–300).
Humidity: 65–70% RH.
Temperature: 20–25°C.
Airflow: Gentle circulation to strengthen stems.
Troubleshooting
Stretching: Caused by insufficient light.
Damping-off: Fungal rot from excess moisture.
Nutrient burn: Avoid feeding until at least 3–4 true leaves appear.
Seedling Care Checklist:
Factor
Optimal Range
Temperature
20–25°C
Humidity
65–70%
Light Cycle
18 hrs on / 6 off
pH
6.0–6.5
Stage 3 – Vegetative Growth (3–16 Weeks)
Biological Growth
This stage focuses on structural growth—leaves, stems, and roots expand rapidly. Plants can double or triple in size.
Environment Needs
Light: 18/6 for photoperiod strains.
Temperature: 24–28°C.
Humidity: 50–65%.
Nutrients: Nitrogen-rich base, supplemented with calcium and magnesium.
Training Techniques
Low Stress Training (LST): Bending branches to increase light penetration.
Topping: Cutting the main stem to encourage branching.
SCROG (Screen of Green): Using a mesh to create an even canopy.
Australian Outdoor Context
Germination begins in September (spring).
Vegetative growth continues through October–January with long daylight hours.
Key Takeaway: Strong vegetative growth builds the foundation for high yields.
Stage 4 – Pre-Flowering (1–2 Weeks)
Identifying Sex
Female plants: Develop pistils (white hairs).
Male plants: Produce pollen sacs.
Photoperiod Transition
Indoors: Switching to 12/12 light cycle triggers flowering.
Outdoors in Australia: Natural daylight reduction in late summer (Feb–Mar) initiates pre-flowering.
Nutrient Shift
Reduce nitrogen.
Increase phosphorus (P) and potassium (K) to prepare for bud formation.
Stage 5 – Flowering (6–12 Weeks)
Early Flowering (Weeks 1–3)
Plants may stretch significantly.
First pistils appear.
Mid Flowering (Weeks 4–6)
Bud sites develop.
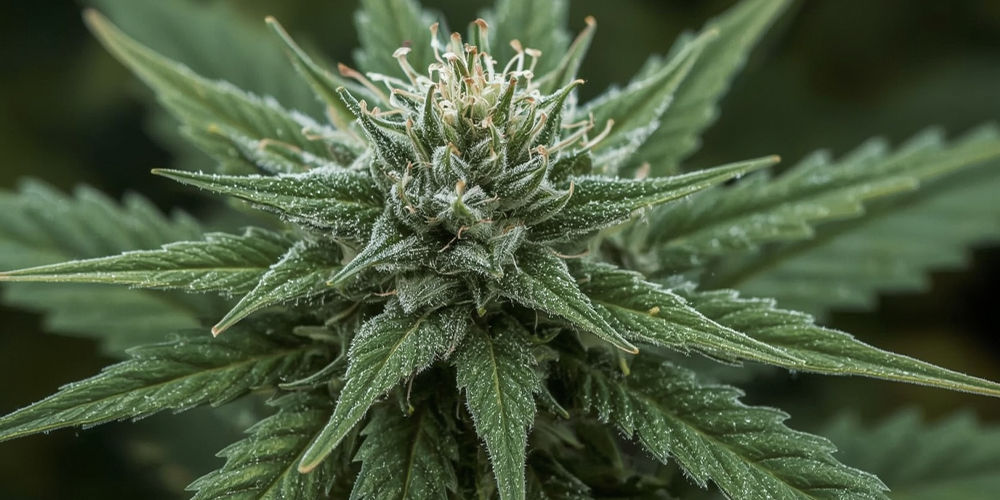
Resin and trichome production begins.
Late Flowering (Weeks 7–12)
Buds swell, pistils darken.
Terpene profile matures.
Environmental Control
Temperature: 22–26°C.
Humidity: 40–50% (lower in late flowering to prevent mold).
Airflow: Strong circulation is critical.
Flowering Nutrient Needs:
Stage
Nutrients Required
Early
Moderate P & K, lower N
Mid
High P & K, micronutrients
Late
Reduced nutrients, prepare for flush
Warning: In humid regions like Queensland and NSW, mold and bud rot are major risks during flowering.
Stage 6 – Harvest & Post-Harvest
Harvest Timing
Trichomes:
Clear = too early
Milky = peak potency
Amber = sedative effect
Flush Period
7–14 days with plain water.
Ensures smoother smoke and cleaner medicinal product.
Drying & Curing
Drying: 10–14 days in 18–21°C, 50–60% RH.
Curing: 2–8 weeks in airtight jars, opened daily for airflow.
Key Takeaway: Proper curing enhances potency, aroma, and smoothness.
Autoflower vs. Photoperiod: Which is Best in Australia?
Autoflower Advantages: Short lifecycle (8–10 weeks), resilient, good for short summers in Tasmania and Victoria.
Photoperiod Advantages: Higher yields, more control, standard in professional and medical grows.
Australia Context: Autoflowers thrive in unpredictable outdoor conditions, while photoperiods dominate licensed indoor facilities.
If you’re curious about how breeders create these unique strain variations, explore The Genetics of Cannabis Seeds: How Breeders Create Strains.
WA/SA: Hot, dry summers → irrigation and mulching essential.
Medical Cannabis Context
Only licensed cultivation is legal in Australia under strict regulations.
Common Mistakes to Avoid
Overwatering seedlings.
Flipping to flower too early.
Skipping training during veg.
Ignoring pH/EC monitoring.
Harvesting before peak ripeness.
Conclusion
The cannabis seed-to-flower cycle is a complex yet rewarding process. Each stage—from germination to harvest—requires precise environmental control, patience, and adaptation to local conditions. For Australian growers, understanding seasonal timing and climate challenges is essential, whether cultivating outdoors or indoors under license.
By mastering the seed-to-flower cycle, growers can optimize plant health, increase yields, and produce high-quality cannabis that meets both personal and medicinal standards.
FAQs
How long does cannabis take from seed to flower in Australia? Typically 12–20 weeks, depending on strain type and growing method.
What light schedule is best for veg and flower? Veg: 18/6. Flower: 12/12 (for photoperiod strains).
Can you grow cannabis outdoors year-round in Australia? No, cannabis is seasonal outdoors. Flowering occurs as daylight shortens in autumn.

One Response